
Foundation makes or breaks the face.
If you have a good foundation, it will seem as though nothing is even on your face. If you don't, lets be honest, you're face looks like cake with frosting spread all over. I went through that phase in my teenage years, and I'm so glad I'm out! I've tried everything from the cheapest brands, to the most expensive... and honestly, price doesn't really make the difference between the quality. My favorite brands range in price, and I'm going to list my favorites!
If you like liquid foundation--

Revlon Photo Ready--
$10
This foundation is great! This one is a little thicker so it's great because all you need is a tiny bit, and it last forever. It leaves the face flawless, even more so then it already is!..(because I'm assuming you take really really good care of your skin) :)
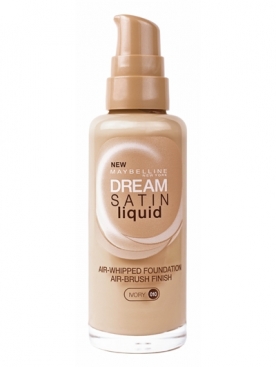
Maybelline Dream Liquid
I found this foundation a few years ago, and have been in love with it ever since. It goes on just like it says, like satin. It is verrrry smooth & when applied, isn't clumpy or thick. I do have to be careful about how much is applied with this one, because it can make my nose oily, so I never apply it there! I put this on the outer and lower corners of my cheeks & jawbone.
I know that using fingers to put on makeup is one of the best ways, but I don't believe thats true when it comes to applying foundation. I suggest always using either a sponge, or a foundation brush. Using those will help apply it more evenly.
I have both of these liquid foundations in my makeup compartment just as backup, but I do not regularly use them.
What is my foundation regimen?
I am completely obsessed with
Bare Minerals.

My sister showed this product to me about a year ago, and I've been in love ever since. Bare Minerals is sooo great because it acts as a liquid foundation, and a powder set at the same time-- two in one. It goes on SO light, yet hides any blemishes & perfectly covers the face.
There are a few different brushes you can use:

First-
I always use the brush on the very right. I dab it into my Bare Minerals Powder & use light brush strokes to cover my whole face. This is the part where it goes on more like a foundation. When first applied, its going to look like it is a streak and won't spread.. but trust me, it does...just make sure you take your time, & really blend it in with lots of light strokes.
Second--
I use the brush on the very left. This brush has short & tight bristles that really helps with the blending. This is the part where Bare Minerals acts as a setting powder. I take this brush, not putting ANY powder on it, and just blend what I put on in the step before. (use more of a medium force) After, I take a light amount of powder, and use light circles on my skin to set the makeup. (the bristles barely even touching my face) I RARELY use their normal foundation brush (the one in the middle).
I put my concealer on, & I'm done.
Depending on my mood, I will add either/or a matte bronzer below my cheekbones, and a blush to the apples of my cheek.
(I don't add bronzer and blush every time)
...Put on my Highlighter (see post below)
....Curl my eyelashes
(the most effective step to brightening a face, even without mascara on)
& I'm done.
Any extra tips or comments?
Let me know!
No comments :
Post a Comment